Sunday, January 4, 2015

Welcome to Semester 2 -- Desktop Publishing with Adobe InDesign

Welcome back class...

Thank you for returning and I hope we have a creative and productive semester together!

We are going to learn how to do Desktop Publishing with a tool called InDesign.  You will need to go into applications and look for this icon.


1.  Introduction video about InDesign.  Click here to watch as well.

2.  Go look for a logo of a company you want to work for (even if pretend).  Have the logo up on your screen for everyone to see.  Hold Control and click on the icon to save to your Download folder.

3.  Let Mr. Komar take over to show you some important terms and definitions for using Adobe InDesign.

4. Make a Letterhead.  Go to the Shared Folder and open the folder 01 Indesign Letterhead.   You will find the instructions and parts you need to begin.  
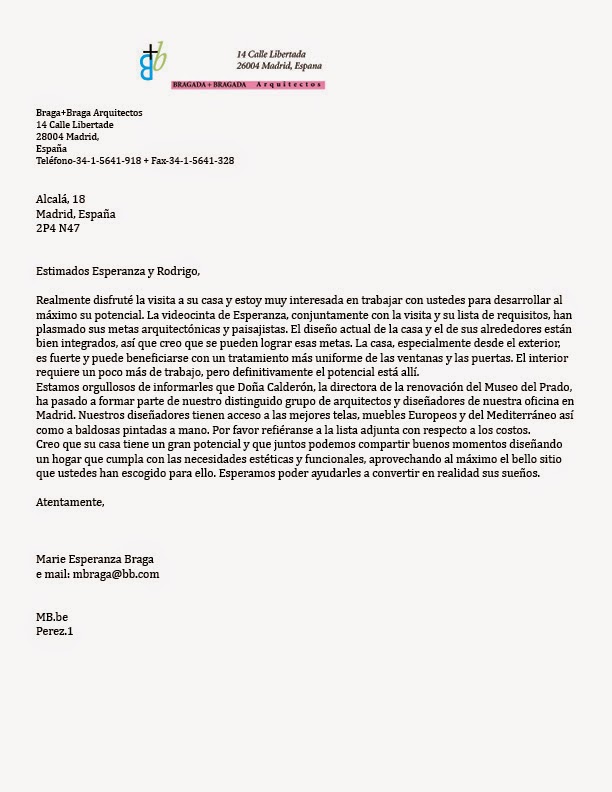
5.Save the file as 
period#_lastname_firstname_1x.indd

Letterhead Project: 50 Points
Due: 1/7/2015

AFTER 45 MINUTES ON LESSON 1 - BEGIN LESSON 2


Due 1/7 : Exercise 2 - A Music Concert Poster
100 Points

The "poster" has been a graphic form to announce, inform, advertise, entice and generally set a tone for an event.  You are going to follow the instructions in the Mr. Komar shared folder to make a poster like the one above.  

You will have a chance to be creative by choosing what bands you want to appear at this "concert".  

However, you will make it look just like the one above.

Later we will be more creative and open up the design but this exercise is to learn more about InDesign.

You will learn:
1.  How to use the ruler
2.  How to use guides
3.  Polygon shapes
4.  Centering text
5.  Changing font type
6.  Coloring shapes

Save the file as 
period#_lastname_firstname_2x.indd


Sunday, December 14, 2014

Please complete this anonymous survey

Class:

For the final project of the semester, please go to the following link and complete the JTED/CTE survey.

TAKE THE SURVEY


The survey is anonymous and I value your opinion! 

Thank you.

Mr. Komar

Friday, December 12, 2014

Use WordPress to create your own portfolio blog

50 Points
Due Dec 16

For the final project, go to www.wordpress.com and set up your own website/blog and show us 3 of your best pieces of work.  Include text to tell us why you liked it.

Steps:
1.  Go to www.wordpress.com
2.  Set up a website as a blog.
3.  Make a post or multiple posts and upload images of your best 3 pieces and write why you liked those pieces.
4.  Be ready to show to class at end of period.

You will have to convert ANY Adobe file, like Illustrator, into a file format ready for the web.

You need to have all your work in file formats that can be displayed in a browser - JPG, PNG or GIF. (Remember the animation?  Remember we had to save as a GIF format?)

As a review, JPEG, PNG and GIF are file formats that compress the original image and put it into a format that can be displayed by browsers from multiple companies.  In other words, you do not need special software to view the file.  JPEG will compress your file but it will also reduce the file size, nice for sending files over communication lines but not nice if you want to preserve the quality of your photos.  PNG has become popular in the last few years because it is "lossless".  Supposedly you will not lose quality.

STEPS to make Adobe Files into Web Ready Files:
1.  Open Finder,
and start to organize your files on your computer.

Place all of your content in various folders into your DOCUMENTS folder.

Place all your content into smaller folders for each exercise, like 5_last_first_15x

2.  Open Adobe Illustrator,
3.  Open all of your Illustrator work from the first semester and go to File > Save for Web..

4.  If you have multiple pieces of art in a file, or you want to break up an Illustration, you need to make or edit your art boards.  Click the Artboard icon.


The 3rd art board in my file will be saved because it is "selected".  If you click on the other art boards, you can then go to File > Save for Web... and those art boards will be saved as JPEG or what ever format you select.

5.  You need to try to get your images to a size roughly 1000px x whatever.  In other words, make your images that are super big (over 1000px wide) smaller and the smaller ones you can decide to make them bigger or not.  A smaller image may be better to leave small.

Good Luck!

Wednesday, December 10, 2014

Exercise 27 Update - What a completed piece should look like


Notice how clean and well placed the images.

Notice how there is some kind of precision...not exactly but close...

Sunday, December 7, 2014

Exercise 27 - A Scavenger Hunt!

Wait for worksheet and presentation to see what to do today.

Be ready to move...

How to turn in:


  1. Take photos
  2. Import Photos
  3. Start a new Photoshop file 8.5x11 and make it either portrait or landscape (tall or wide)
  4. Use Photoshop to open photos 1 at a time and crop to get the part you want.
  5. Save the file as period#_lastname_firstname_27x

Thursday, December 4, 2014

File clean up and preparation for a web portfolio

Today you will want to spend time preparing your files for your own Portfolio to be on the web.

You need to have all your work in file formats that can be displayed in a browser - JPG, PNG or GIF. (Remember the animation?  Remember we had to save as a GIF format?)

As a review, JPEG, PNG and GIF are file formats that compress the original image and put it into a format that can be displayed by browsers from multiple companies.  In other words, you do not need special software to view the file.  JPEG will compress your file but it will also reduce the file size, nice for sending files over communication lines but not nice if you want to preserve the quality of your photos.  PNG has become popular in the last few years because it is "lossless".  Supposedly you will not lose quality.

STEPS:
1.  Open Finder,
and start to organize your files on your computer.

Place all of your content in various folders into your DOCUMENTS folder.

Place all your content into smaller folders for each exercise, like 5_last_first_15x

2.  Open Adobe Illustrator,
3.  Open all of your Illustrator work from the first semester and go to File > Save for Web..

4.  If you have multiple pieces of art in a file, or you want to break up an Illustration, you need to make or edit your art boards.  Click the Artboard icon.


The 3rd art board in my file will be saved because it is "selected".  If you click on the other art boards, you can then go to File > Save for Web... and those art boards will be saved as JPEG or what ever format you select.

5.  You need to try to get your images to a size roughly 1000px x whatever.  In other words, make your images that are super big (over 1000px wide) smaller and the smaller ones you can decide to make them bigger or not.  A smaller image may be better to leave small.

Good Luck!

Tuesday, December 2, 2014

Exercise 26 - Your Own Magazine Cover

Due December 5
100 Points


Have you ever wanted to be famous?  No?!?  Well, that's o.k. but if you have ---- now is your chance!

Requirements:
Use Adobe Photoshop to make a magazine cover.

Use a camera to put your own self on the cover.  If you do not want to put yourself then find someone to put or find a nice image to use, for example an architecture magazine.  NO BLURRY PHOTOS OR GRAINY IMAGES ALLOWED.  Get the big big big images - please!

Use free fonts on the web (Font Book, remember?) to add articles.

1.  The page must be 8.5" x 11"
2.  The cover must have a title (you can put yourself on a magazine that exists now or create your own magazine.  You can also do special edition issues, like a one time only concert.)
3.  The cover must have at least 4 pretend "articles" that someone might find inside using different fonts.
4.  You must save the project to your computer and go to File>Save for Web... and save as a JPEG to turn in.
4.  Name the file name: period#_lastname_firstname_26x.  


5.  Put the file into the Mr. Komar DropBox

Remember - to get credit, you must have some custom fonts, and it must be a JPEG!!!